Brewing Equipment Upgrades:
Additional insulation to my Mash Tun
Larger Wort Boiler / Copper
New 9.2kW Gas Burner (3 valve taps)
Modified sparging device - Original was fitted in the lid which made it awkward to see it in order to adjust the flow rate.
I was very happy with the performance of all my home made stuff, especially the mash tun this time around. Only 1C temperature loss over a 90 minute mash. The other star of the day was my homemade Wort Chiller - I fired it up to get the boil down to 80 to add the post boil hops, before I had chance to fill in my brewing record and grab the thermometer to check it was close to 80, the temp had been brought down to 70C! Less than 3 minutes!!!!!
Anyway, on with the brew... it was a later start than I'd planned thanks to some boring, work stuff (I'm supposed to be on holiday).
Courage Directors from Graham Wheeler's superb Brew Your Own British Real Ale a book I can't put down or recommend highly enough.
Target volume 23l - I only ended up with 20l so there was more lost during boil than allowed for. I didn't top up this time, the gravity was a little higher than target but I decided to leave it alone - one of my biggest mistakes on brew 1 was to top up the post boil hopped wort with freshwater... This brew may be stronger than the recipe suggests or it may be a bit sweeter if the excess sugar is fermented out but I'm just going to wait and see.
Target OG 1046 - Actual reached 1050 (I still don't know how to calculate brew house efficiency)
10:00 As well as the above mentioned malted grains the recipe called for Target bittering hops and Styrian Goldings post boil aroma hops. Irish Moss copper finings and BruPaks Top Fermenting Ale Yeast which I re-hydrated and started off with a little of the wort from the first runnings of the mash. (It was going like the clappers by the time came to pitch the yeast later that day)
 |
| Grain Bill - Maris Otter Pale Malt, Crystal Malt & Black Malt |
 |
| HLT coming up to 75C for the mash. |
11:30 This time I heated the liquor in the HLT to 75C and preheated the mash tun with a kettle full of boiling water.
 |
| Transferring 10.3/10.4 litres hot liquor (water) to the mash tun - fitted in the PU foam insulated box |
11:40 I got my strike temp in the mash tun after hot liquor transfer at 72C which was about what I was aiming for. After the addition of the malted grains and doughing in the mash temp was bang on 67C that I was aiming for.
 |
| Doughing in the grains and hot liquor in the mash tun. |
pH test strip showed 6 (possibly 6.5) after a couple of minutes and just prior to putting the lid on.
11:45 - 90 minutes mash time gave me time to go into the office and get some work done. I was really pleased to find the mash temperature had only dropped to 66C in the 90 minutes and the smell, on removing the mash tun lid was awesome!
 |
| 13:15 Running off the sweet wort. It quickly got darker than it looks above. |
13:15 As before, the first run off was a tad cloudy and contained a few bits of debris but I was ready for it this time, caught it in a jug and returned it to the mash tun. The filter bed established quickly and after maybe a litre and a half in the jug I began to run the wort off into the brewing copper.
 |
| New sparge system in place and connected to the HLT |
13:20 While the sweet wort was running off into the copper I set up the modified sparge system (shown above seated on the top lip of the mash tun) and heated the sparging liquor in the HLT to 80C
 |
| Beginning to sparge the mash bed. Gorgeous colour and the smell was fantastic! |
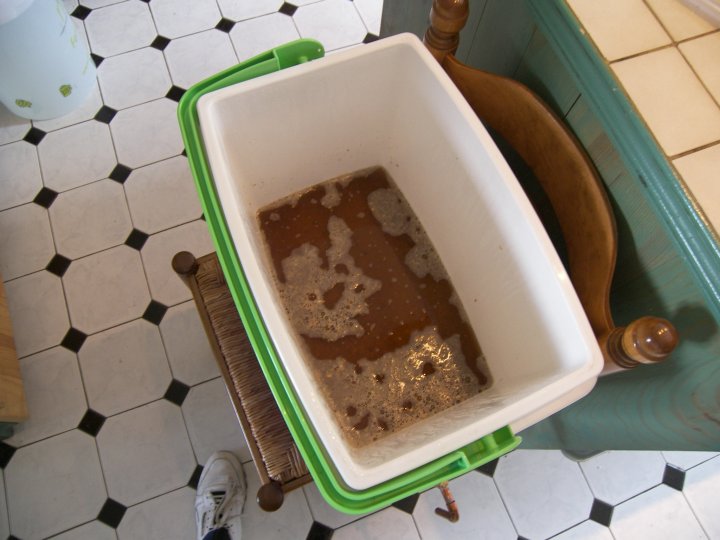
13:30 Began sparging the mash bed with liquor at 80C. The new version of the sparging system worked well but need a bit of help to keep it level to ensure the hot liquor flowed out of all the holes around the tube matrix to cover the grain bed surface area. My mash tun just rests on a chair for now and is slightly off level. Run off temp of the sparged wort was 60C.
13:55 Finished the sparge as the run off (now 58C) was no longer tasting sweet and was virtually colourless. Total wort volume ready for the boil, 22.5 litres. I topped this up to 30l with the remaining liquor from the HLT and got ready for the boil.
 |
| 30l wort in the copper and approaching the boil. Break material forming. |
The new gas burner again came into its own for the boil. Starting temp of the sweet wort was 58C and a vigorous rolling boil was achieved in 30 minutes! Brew 1 took almost an hour to begin boiling and never actually reached a proper rolling boil.
 |
| 14:20 Rolling boil and the hot break begins. |
14:20 There was a lot of things happening very quickly once the rolling boil began. I had to adjust the burner quite a bit for the first 10 minutes or so to avoid a boil over. The break material on the top came very close to the brim of the copper - even before I'd added the bittering hops. Having read that the hop addition can cause a big surge in the surface activity I waited a few minutes for things to calm down a little before adding them.
 |
| 14:23 Bittering hops added. The effect was minimal the surface of the boil behaved. |
14:23 26g of Target hops added to the boil. Totally expecting a big surge in the surface activity and further scrabbling to adjust the burner I was surprised that not a lot happened when the hops went in. The break material head (not really sure what it's called) rose up a little but settled quickly.
As you can see in the video above the rolling boil was definitely rolling this time. I got nothing close to this on brew 1. For the most part the burner wasn't on full power either, the outer burner rings turned to about 50% and the inner ring around 65-70%
 |
| 15:40 Wort Chiller placed in the boiling wort, 15 minutes before the end of the boil. |
15:40 Wort chiller placed into the copper - The boiling wort sterilizes the copper coils of the immersion chiller.
15:45 Irish Moss copper finings added with just ten minutes of boil time remaining.
15:55 Boil finishes and the wort chiller is turned on. Cold water runs through the chiller and via heat exchange begins to lower the temp of the boiled, hopped wort to 80C for the addition of post boil, aroma hops (Styrian Goldings) and then further still, after a rest to allow the hops to soak a while in the still hot but not boiling wort, to get the temp ready for pitching the yeast (between 20C and 30C).
 |
| Aroma Hops added at 70C - The chiller worked so well the temp whizzed past my target 80C in the time it took me to make a few notes and rinse the thermometer... Almost 30 degrees in 3 minutes ish. |
The first water out of the chiller was hot enough to fill the sink for washing up and the mash tun for washing it out but quickly cooled. The remaining "waste" cooling water barely filled 3 watering cans so the actual amount of wasted water is quite low. My homemade wort chiller is very efficient it seems :)
 |
| OG 1048 @ 30C (calculated to 1050 at 20C calibration of Hydrometer) See also how I have managed to get the background perfectly in focus... FFFUUUU! |
A quick test of the gravity at 30C gave me 1.048 and using the conversion table I made that to be actually 1.050... 0.004 over the target gravity of 1.046
 |
| Running the cooled, hopped wort into the fermenter. |
16:50 I only managed to get 20l of wort out of the target 23l so boil evaporation losses were higher than the recipe anticipated. I decided to leave it alone rather than top up with freshwater, even though the OG was slightly higher I didn't know how much difference to it adding 3 litres of freshwater would make. I didn't want to end up below the target gravity. Next time I'll add more water to the pre boil total liquor quantity.
17:00 At the time I thought I'd seriously screwed things up at this point. Having taken the gravity reading with the temp at 30C some minutes before while the wort was running into the FV - with me beating it vigorously to aerate it - I pitched the yeast assuming by now the temp would have dropped further below 30C...
 |
| Waiting for the froth to subside a little before pitching the yeast. |
I'd got 30C in my head but that was the temp in the small hydrometer test tube, NOT the fermenter! With a grimace I found my way through the foam and dipped my thermometer into the fermenter... 32C Aaaarggggghhhhhhhhhh! After all that careful rehydration and nurturing of the yeast during the brewday had I just pitched it into the wort, too hot!??!!!?
 |
| Yeast rehydrated and mixed with wort from the mash tun (taken during sparging). By the time I pitched the yeast the froth was above the level where you can see the foil reaching. |
All I could now was place the lid on loosely, take the fermenter through to our entertainment room and onto the bar (22-24C most of the time) and wait with fingers crossed that after such a good brew day I hadn't gone and buggered up the yeast.
Four hours later, I knew I'd gotten away with it...
 |
| 4 hours after pitching the yeast |
After 4 hours the yeast head was already better and more lively than the head on my first brew.
I was delighted with the whole day, my equipment worked well, I felt more relaxed and in control of what was going on and ended up with a bucket of amazing smelling, superbly coloured beer.
Why are we here? For the beer! Roll the bones.
UPDATE 12/09/11 First pint of my all grain Courage Directors enjoyed :)
UPDATE 12/09/11 First pint of my all grain Courage Directors enjoyed :)