 |
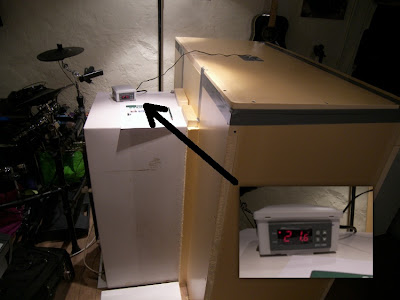
| Front view all sealed up |
I've been trying to get hold of one or two, secondhand fridges to convert into Fermenting Cabinets.
You may be familiar with the concept of an FV Cabinet or you may not so in case you don't know here's a quick explanation.
Yeast performs better at certain temperatures and if the temperature of the environment in which the FV is located varies the yeast can do funny things. Fermentation times can vary, flavours can develop differently and well... generally it takes away another level of consistency when trying to reproduce recipes.
So, take a fridge for cooling, a small heater - for heating and wire the two into an external temerature controller such as the STC-1000
Place the heater in the bottom of the fridge and your FV on a shelf above - probably advisable to build your own shelving system to fit in the fridge.
The controller is set to eg 18C and if the sensor (supplied with a nice long wire) in the fridge detects it is warmer than that it'll switch the fridge on... If the temp drops too low the STC1000 will switch the heater on. Because the fridge walls are insulated neither the fridge or heater have to run for long to keep a perfectly stable temperature for your yeast.
My dilemma was I couldn't find a suitable fridge, so I used a smaller, old one and built a large extension for it from PU Foam insulation panels.
MK1
 |
| Under construction. The PU foam screws together easily using some flat headed decking type screws. A steel rule, sharp knife and a tape measure. The foam cuts easily and cleanly. |
 |
| Rear view, the old fridge built into the back. Temp reading 21.6 and the cooling light is on as the fridge brings the temp down to 18.5C. Alesis DM10 electronic Drumkit is not part of the set up :) |
No comments:
Post a Comment