|
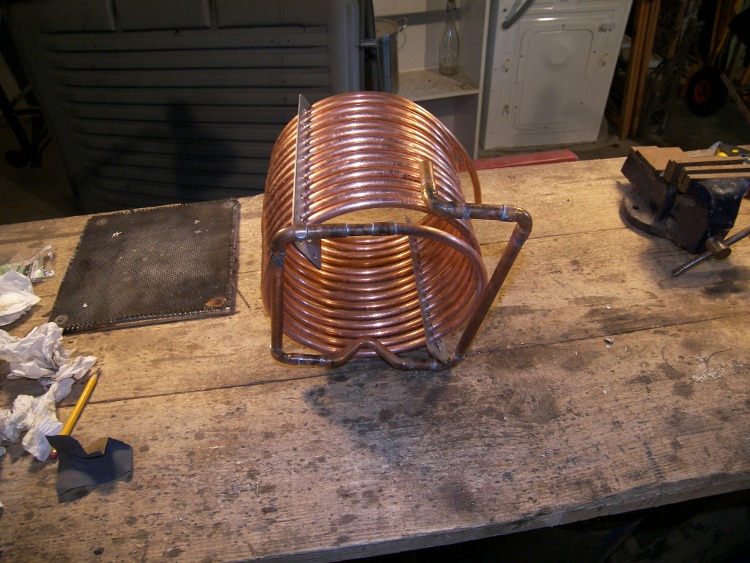
| Copper pipe coiled and ready to fit to a base unit designed to support the wort chiller in the hot, hopped wort. Note the kink in the centre of the base, rear (left of pic)? That's there to clear the hop strainer in the base of my brewing copper (boiler). |
Further to my post yesterday I have a few photos taken during the building of my immersion chiller. Quick re-cap the chiller is used to rapidly cool the boiled wort with bittering hops and later aroma hops to a temperature suitable for pitching (adding) the yeast. If the wort is too hot it will simply kill the yeast.
At one time the hot wort was allowed to cool overnight but this is:
a) very slow
b) a long time to leave the vulnerable liquid exposed to possible contamination
An immersion wort chiller is a simple coil of copper tubing that is placed in the hopped wort in the boiler a few minutes before the end of the boil (this sterilizes the tubing). Once the boil stage is finished, cold water is pumped through the chiller and a simple heat exchange takes place, the cold water is heated as it removes the heat from the hot, hopped wort. This can be quite a wasteful process so I am keen to develop it to use the minimum water and also a way to somehow re-use it - possibly pumped from one storage vessel to another via the copper coil and back again the next time it's used.
The initial hot water outflow from the chiller can be used for washing equipment.
My first, "worry" was how to bend the copper coil with a diameter larger than my boiler to a size small enough to fit in the boiler and also miss the pipework that acts as a hop filter... Hmmmm, I tried bending the end of the tube by hand but it seemed rock solid and considering it's meant to be "soft" it didn't seem so... bugger!
 |
| Base support for my home made Immersion Wort Chiller. The fatter pipe in the base is the hop filter leading to the external valve. I wanted to design a chiller base that would happily sit securely on the base of the boiler without interfering with the hop filter. |
While I pondered how to bend the copper pipe neatly and without kinking it I began knocking up the base shown above.
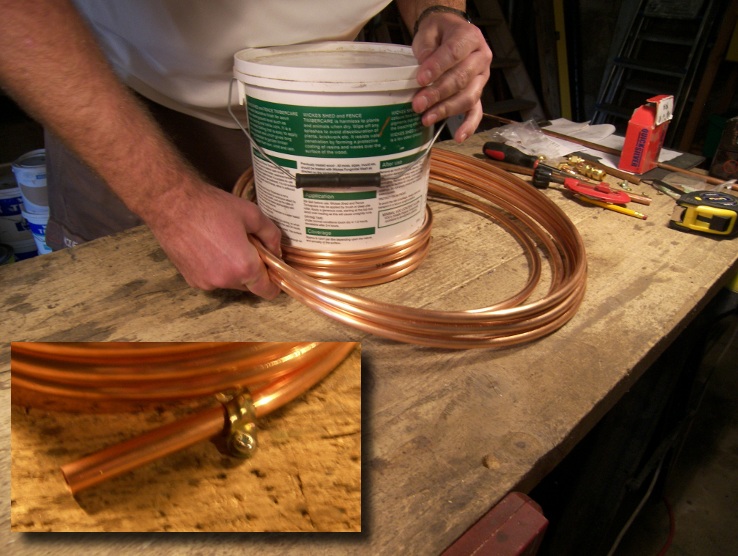
I could delay no longer and had to at least try to bend the coil and so, in a moment of clear thinking, I screwed a 10mm pipe clip over the bottom end of the coil to stop the coil moving. I then placed a very technical tin of fence treatment in the coil and began to turn the coil, easing the part in contact with the tin around a bit at a time as shown below.
(inset pic shows the support fix to the bench)
 |
| Bending the copper pipe. The first coil was hardest to do as the tin kept trying to move, after that the first, new coil actually holds the tin in place and helps a great deal. |
All in all it took about 5 or 6 minutes to bend the coil. At first it was quite aukward as pulling the pipe around the tin was making the tin move. After the first coil had wrapped around the tin though it held it in place and the rest followed quite easily. I was very surprised at how easy it was, I was expecting it to be a total pig and this is something I've been putting off doing for that reason.
 |
| <rawhide>Coiling, coiling, coiling. Keep that copper coiling!</rawhide> |
After a few minutes this is what I ended up with. Niiiiice.
The bottom pipe will solder onto the base I made and the top will connect to either the outflow to waste or inflow from the cooling source. I am undecided as yet which way to run the chiller. Some brewers say cold in at the bottom, hot out at the top. Others say the opposite. At the end of the day it can run either way so I think I'll just do both and see which gives best results.
 |
| Almost finished. The upright facing elbow at the rear, right of the base will have along pipe attached for the water supply to connect to. |
Looking at how the copper pipe collapses back down onto itself in a tight coil I think I might get some stainless steel strips, or aluminium and drill 11mm holes spaced evenly. thread the tub through the vertical, drilled strips and they'll space the copper tubing allowing a greater surface area of contact with the hot, hopped wort.
I am just about to go and finish the chiller off so there should be an update later today.
Follow the link for PART 2 of
building my own wort chiller.